
Question Paper Images

2026 WAEC Garment Making Practical Questions and Answers
This page provides reliable study help for the 2026 WAEC Garment Making Practical paper. Use these structured notes and sample answers to revise the key practical steps, processes and techniques that are commonly tested so you can enter the exam hall with confidence.
Number One
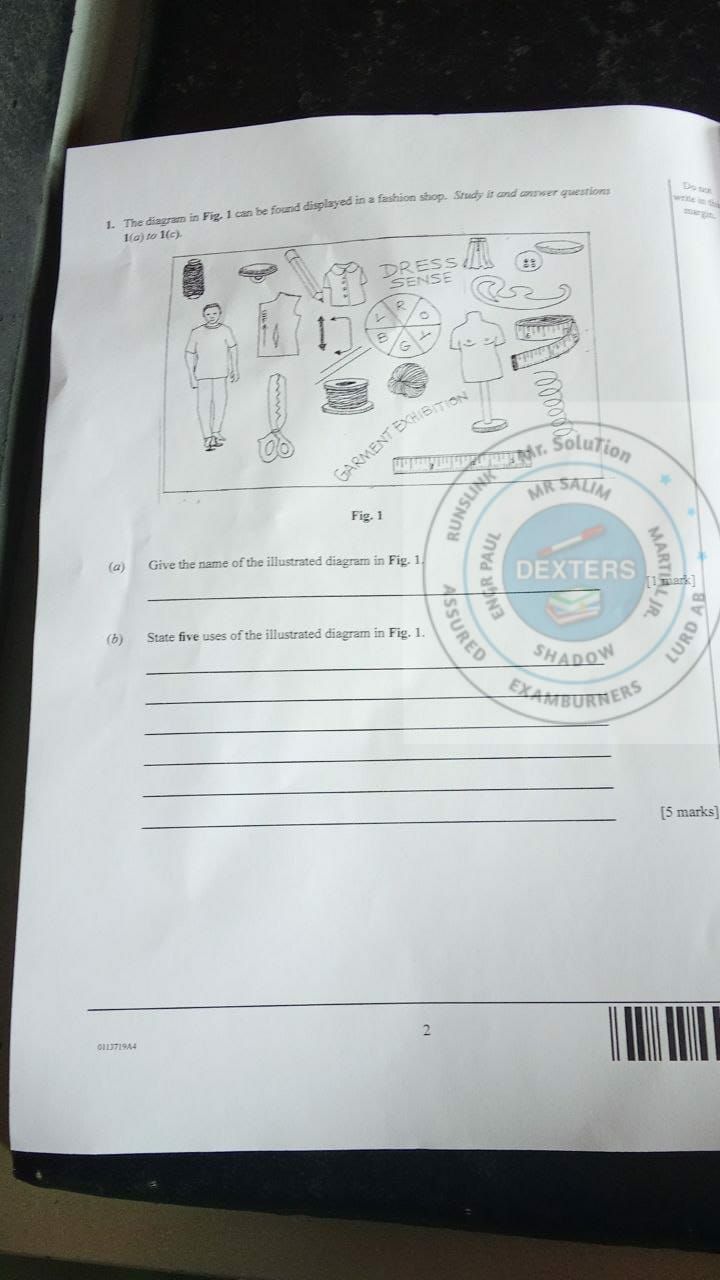
1(a) — Identification of Specimen
(i) A Chart (Garment Making Chart)
1(b) — Uses of the Specimen (Chart) — Pick Any Three
- (i) It helps students easily identify different garment-making tools and equipment.
- (ii) It serves as decoration for a fashion shop or clothing studio.
- (iii) It is used for advertising or promoting fashion-related activities or exhibitions.
- (iv) It helps customers understand basic fashion concepts and make better style choices.
- (v) It serves as a quick visual reference guide for tailors and dressmakers during work.
1(c) — Importance of Good Lighting in Garment Making — Pick Any Three
- (i) Accurate color matching of fabrics, threads and accessories.
- (ii) It ensures precision and accuracy in measuring, cutting and stitching.
- (iii) It prevents eye strain and fatigue during detailed work.
- (iv) It improves safety and helps prevent accidents with sharp tools and machines.
- (v) It aids proper inspection and quality control of finished garments.
Number Two
2(a) — Steps for Drafting a Magyar Sleeve Pattern
- (i) Trace the basic bodice block onto pattern paper.
- (ii) Extend the shoulder line outward to form the Magyar sleeve shape.
- (iii) Mark the sleeve width by dropping a line from the extended shoulder.
- (iv) Redraw the underarm curve by joining sleeve opening to side seam smoothly.
- (v) Extend the length to required dress length and add seam allowances.
2(b) — Steps for Setting in a Gusset
- (i) Mark and slash the underarm area carefully and reinforce the point.
- (ii) Pin the gusset to the right side of the opening, matching corners properly.
- (iii) Stitch carefully from one end through the apex to the other end and neaten seams.
2(c) — Methods of Neatening Seam Allowances (Pick Any Two)
- (i) Overlocking / Serging.
- (ii) Pinked finish.
Number Four
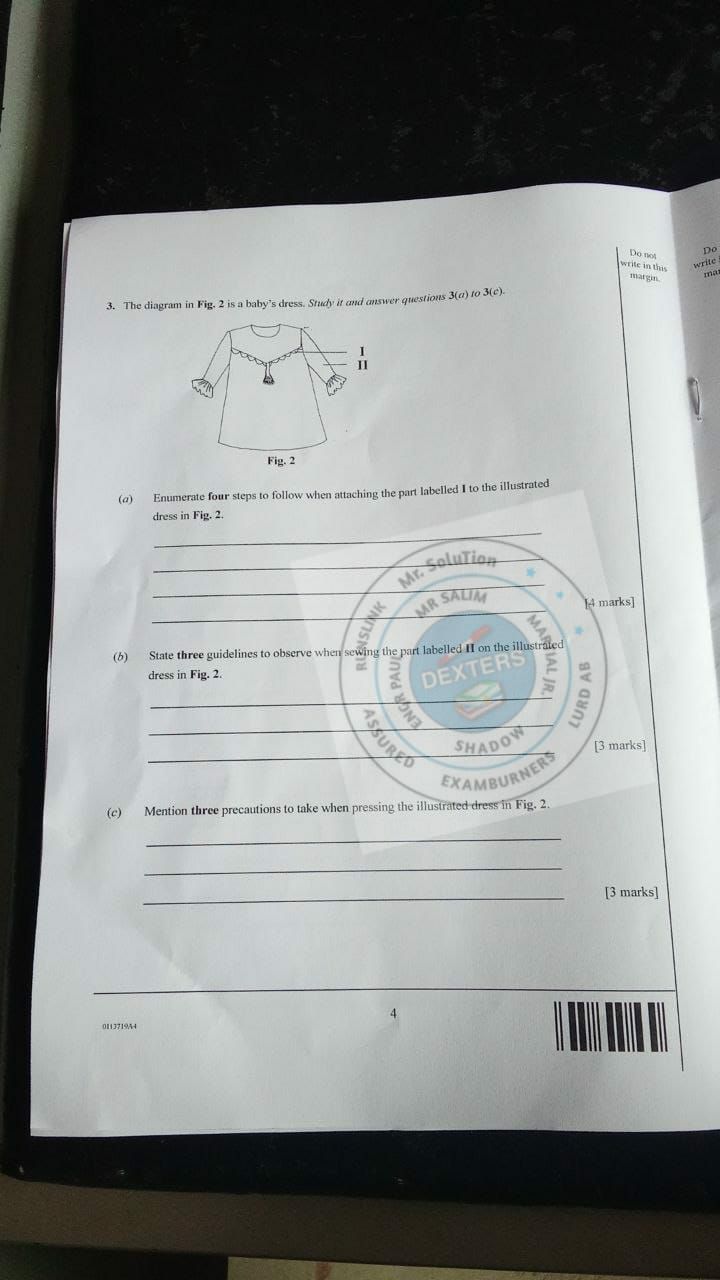
4(a) — Steps for Applying Bias Binding to the Neckline of a Blouse
- (i) Cut a bias strip on the true bias (45° angle) or use a ready-made bias tape.
- (ii) Open one folded edge and pin it to the right side of the raw edge of the blouse.
- (iii) Baste the bias strip in place to hold it firmly.
- (iv) Machine stitch along the crease/seam line through both layers.
- (v) Trim and clip curved edges to reduce bulk.
- (vi) Press the seam allowance towards the bias strip and turn it over the raw edge.
- (vii) Fold to the wrong side and secure by slip-stitching or edge stitching neatly.
4(b) — Suitable Fabrics for Bias Binding (Pick Any Three)
- (i) Cotton / Calico.
- (ii) Satin.
- (iii) Silk or Chiffon.
- (iv) Polyester or Cotton-Polyester blend.
- (v) Rayon / Viscose.
See Also: Other 2026 WAEC Questions and Answers
Join our WAEC 2026 WhatsApp channel for more updates and exam tips:

Leave a comment